As the holiday season approaches, consider heading into the kitchen and making a bunch of something, and giving some of it to everyone you see. The choices are many–cookies, candies, soup mixes, moonshine. A large scale making operation can be a lot of fun, whatever you make. However, making a bunch of something can be trickier–the larger the number of things you’re making, the greater the opportunity for disaster.
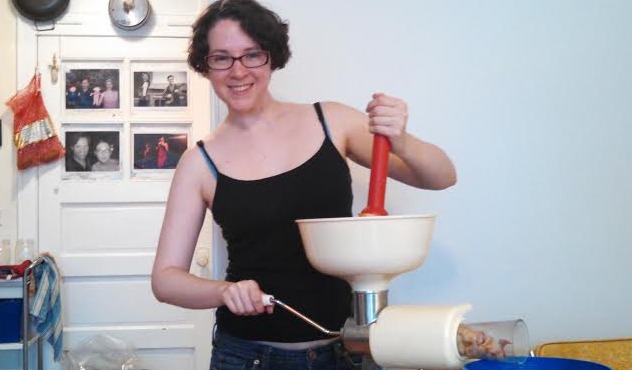
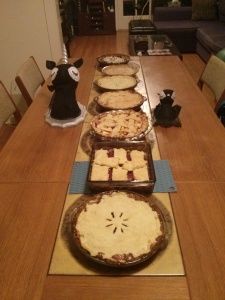
The Illustrious A and I just finished making seven pies in as many hours. We’re a little bit strange, in that both of us thought, “Let’s make as many pies as we have pie plates between us, in a single day, and each pie shall be different, unique amongst the pies!” was an absolutely swell idea. We had a special, “Let’s look at the recipes!” meeting. We had emails about the pies. We had dreams and hopes about the pies. I think we’re awesome, and you would too, if we gave you some pie.
Baking a lot of things at once may not be everyone’s idea of a swell time, but we had an irrational amount of fun. However, our pie baking extravaganza could have been a disaster, even though we both love baking. It wasn’t, because of some very specific things we did in the name of efficiency, camaraderie, and sanity. We’ll introduce each pie we made from the Farm Journal Complete Pie Cookbook (c. 1965) this week, but before all of that, let’s cover some basics for baking success when you’re making a ridiculous quantity of baked goods.
Here are some of the top lessons from our successful seven hour pie extravaganza, to help you in your own adventures:
1. Don’t go at it alone.
A and I agreed, climbing Seven Pie Mountain alone would have been a drag. It would have taken a lot longer, and we’d probably have gotten a little frustrated and bored. Instead, we were able to entertain each other and became a two-woman pie-making machine. If you are working on something big, consider inviting a friend, or spouse, or child, or neighbor into your project. Twice the hands make half the work, and all that.
2. But choose your partner carefully.
Not everyone who likes each other should share a kitchen. When choosing your partner-in-crime, think about how you might work together. A and I are very well suited to baking together, because we have a similar working style and energy, and were equally excited to do the project. If you and your spouse constantly bicker about who is chopping apples the “right way” and who is out of their damn mind, I suggest that an epic baking project may not be that fun for you. Likewise, if you’re very neat, and your son uses every single bowl in the kitchen to make toast, again, maybe you should just go to lunch together, not bake for hours on end. Perfectionists and “Looks Good Enough to Me” people, people who are having a fight about something else, people who are trying to decide if maybe they should get married or if maybe it’s the wrong time–stay out of the kitchen.
3. Plan ahead.
Figure out what you can do ahead of time. We chose our recipes and made a grocery list to divide and conquer a couple of days before Piemageddon. Since she is a true hero, A peeled and chopped all of the apples we could possibly need before I got to her house. She also bought 15 lbs of flour, just in case. I made seitan the night before. We gathered dishes, and made sure we had an extra rolling pin and pastry cutter. These little things made everything run smoothly. We didn’t have to wait for the other person to finish with a tool, or run to the store for another pound of apples. Since we had scheduled the entire day to work on pie, we could work at a reasonable pace, rather than frantically try to finish up by a certain time.
Try to gather your supplies before the day of your project. That way, you can spend your project day doing the project, rather than doing prep work for the project. Consider scheduling your day a couple of weeks ahead, and blocking off the calendar. Then collect the supplies over the course of the weeks, rather than all at once.
4. Strategize
Not only do you need a plan to prepare, you also need a plan of attack for the day of your project.
This is where following the first lesson and teaming up with someone really worked out. “What’s the oven temp for each recipe?” A asked, at the beginning, like a smart person does. We noted each temperature, and then scheduled the order of our baking from the lowest to the highest temperature. We didn’t have to wait for the oven to cool down, we just turned it up as we went. Without her, I would have no doubt ordered things haphazardly, turning the oven up and down and up and down, and making everything take a hundred years.
We were very strategic about multi-tasking. Instead of trying to do many things at once, we cooperated to make the most of our time while each doing one thing. We made the pie crusts one recipe at a time, but each made our own batch, doubling the output without doubling the recipe. We didn’t try to work on multiple pies at once, instead we cooperated in true Sesame Street fashion–I’d stir filling on the stove while A rolled a crust, she’d put things in the oven while I washed some dishes. Neither of us got flustered or confused, because we still only had one job at a time.
Consider variables like temperature, baking time, and how recipes might overlap, then make a plan to maximize your time, but don’t try to do everything at once.
5. Clean up as you go.
Or you will never, ever emerge from the pile of dishes. Never. And unless you have a truly endless supply of measuring spoons, you will eventually run out of clean ones, if you aren’t keeping up on the washing.
6. Eat something that isn’t what you’re baking.
If you attempt to bake for seven hours, eating only snatched spoonfuls of pie filling, and the leftover bits of apple on the core, you are going to be cranky. And possibly dizzy. And you will say a lot of angry things about deciding to climb Seven Pie Mountain. Instead, we ate a quick, sensible lunch. Taking the time to do this saved us time in fainting.
6. Keep your sense of humor.
After all, you’re just making pie, not fighting The Man, or speaking truth to power, or saving the world. No one will die if your crust breaks. And break it will. So you might as well loudly beg it to stop being a jerk. It may make your partner laugh, and then you’ll laugh, too.
Have you ever baked an irrational amount of something? What are your tips?

