Double the Cranberries, Double the Fun: Two Cranberry Pies

Cranberries are a Thanksgiving classic, so A and I were delighted to make not one, but two cranberry pies. One sweet, and one savory, we liked them both a lot!

First, the savory. Originally, this recipe was for pork and cranberries, but we did a vegan switch and subbed seitan for the piggy, and liquid smoke and some smoked salt for the bacon. The result was delicious. Even meat and potatoes people liked it!
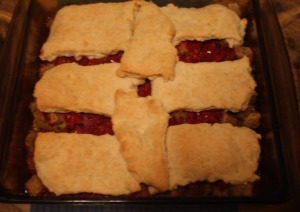
An excellent vegan main course for Thanksgiving.

Here’s how it went down:

Ingredients:

Enough seitan to fill a pie dish. I used the Viva la Vegan recipe for white seitan, which is steamed. I think I used about four loaves of seitan, chopped up, probably about  3 cups.

1 tsp of sage, or meat rub, or thyme, or anything tasty.

quarter cup flour

A solid shake of liquid smoke.

A solid shake of smoked salt.

1 cup ground cranberries

one third cup sugar

1 cup hot water

1 biscuit crust: 1 cup flour, 1.5 tsp baking powder, .5 tsp salt, .25 cup margarine, one third cup almond milk

Directions:

Pre-heat oven to 400 degrees.

  1. Mix the herbs, flour and salt together. Toss seitan to coat. Pan fry in a little margarine, until browned and delicious. Place in a casserole dish, or a deep pie pan.
  2. Combine the cranberries and sugar, and sprinkle over the seitan. Pour cup of hot water over all, and stick it in the oven.
  3. While that’s baking, mix up your biscuit crust. Combine the dry crust ingredients, and cut margarine into it until crumbly. Add milk, stir. Knead it a few times, then roll it out, ideally between sheets of parchment paper. Cut into strips, or circles, or whatever seems cool to you.
  4. Take the seitan cranberry mix out of the oven, place biscuits on top, return to oven.
  5. Bake for about 20 minutes, or until golden brown.


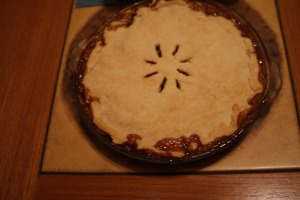
Our sweet cranberry venture was a Harvest Apple-Cranberry Pie. Of all our pies, this is the only recipe I’d tweak for recipe, rather than vegan reasons. It just didn’t set, and while delicious, I think it would be improved by more cooking, which is reflected here. However, the flavor was fantastic.
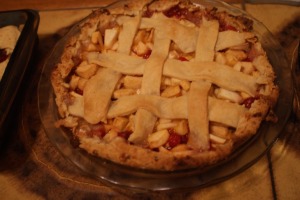
I mean, look at that thing.

Ingredients:

2 piecrusts (bonus recipe for peanut pie crust below!)

.75 cup sugar

3 TBSP cornstarch

.25 tsp salt

.75 cup corn syrup

.25 cup water

1.5 cups raw cranberries

2 tsp. grated orange peel

1.5 cups chopped apples

2 TBSP margarine.

Directions:

  1. Heat oven to 425 degrees.
  2. Mix sugar, cornstarch, and salt together in a saucepan. Add corn syrup and water slowly. Cook over medium heat, stirring constantly, until mixture thickens to a filling-like consistancy.
  3. Add cranberries and continue to cook until their skins pop, add orange peel. Cool mixture.
  4. Add apples to the mixture, pour into piecrust. Dot the top with margarine, add top crust and seal and vent the pie.
  5. Bake for 40-50 minutes.


For this pie, we branched out, and made a Peanut Pie Shell. It was delicious. Here’s the recipe.

Ingredients:

1 cup flour (you should probably sift it)

.5 tsp baking powder

.5 tsp salt

one third cup vegetable shortening

one quarter cup crushed salted peanuts

3 to 4 TBSP cold water

Directions:

  1. Crush the peanuts by putting them in a plastic bag, and banging on them with your rolling pin.
  2. Sift dry ingredients together.
  3. Cut in shortening.
  4. Add peanuts.
  5. Sprinkle cold water over mixture, a little at a time, until dough holds together in a ball.
  6. Roll it out. Put it in a pie pan.
  7. Bake at 425 degrees for 15 minutes before filling.

This crust would be fantastic with a chocolate filling, or a regular apple pie filling.
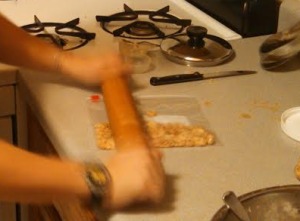
Moving so quickly her hands blurred, A crushes the peanuts with her rolling pin of might.


Mincemeat (Vegan)

This pie would even make Ebenezer Scrooge happy.

You really can’t get more holiday traditional than mincemeat pie. At least, you can’t in England. I think pumpkin eclipsed mincemeat in the States long ago. Mincemeat goes back to the Middle Ages–when Crusaders kindly brought back spices after wreaking havoc on the Middle East, setting up conflicts and issues that we’re still dealing with today, but hey, spices! At that time, it did contain meat– often mutton, or beef tongue. It was banned under Cromwell, since it was associated with pagan (read: Catholic) Christmas celebrations, and in America Puritans banned it along with Christmas celebrations, too. In the 19th century it gained more popularity in the United States, only to fall by the wayside in the 20th century.

Meat proper hasn’t been prominent in most mincemeat for quite awhile. Usually it is a mixture of fruit, spices, and sometimes suet. Making it just “mince”, I suppose.

Our recipe was called “Old-Time Pear Mincemeat, and was originally intended for canning, yielding nine pints. Not really having a need for nine pints of mincemeat, we slightly less than halved the recipe, using a very precise technique known as “Eyeballing It and Hoping It Works Out.”  And work out it did! It was delicious, and smelled like Christmas. More accurately, it smelled like what the final happy scene of Charles Dickens’ A Christmas Carol would smell like, had it a smell.

Here is the recipe.

Ingredients:

2 pie crusts.

3lbs pears, peeled and chopped small. Minced, if you like.
1 box raisins, chopped slightly. A will laugh at you.
One third of a lemon, peel included, chopped small. (I was very skeptical about this, but it was delicious).
3 cups sugar (i.e. why the lemon is delicious)
half cup vinegar
Half a TBSP of cinnamon, cloves, allspice, nutmeg
Half a tsp. of ginger

  1.  Technically, you’re supposed to grind the pears, raisins and lemon together. We did not, because we couldn’t be bothered. We settled for mixing them together.
  2. Combine the remaining ingredients in a pot on the stovetop.
  3. Toss in the fruit mixture.
  4. Bring to a boil, lower heat, and cook until pears are soft and everything smells Dickensian (in a Christmassy way, not a despair way).
  5. Realize there is nothing in this pie to make it set, ponder for a moment.
  6. Use slotted spoon to strain fruit into the piecrust, add one to two cups syrup, whatever looks right to you.
  7. Place top crust, seal edges, vent the crust.
  8. Bake at 425 degrees for 40 minutes or until golden brown.
  9. God bless us, everyone, etc.


Pro Tip: We had a lot of apples leftover from other pies, so we cooked them in water until soft, strained them, put them through a food mill  and combined them with the leftover mince syrup. Voila, Christmas Applesauce.

This is the face you make when you're chopping raisins and your friend is laughing at you.  As a bonus, my long underwear are riding up over my girdle, making me appear pregnant. I am not pregnant, don't get excited.
This is the face you make when you’re chopping raisins and your friend is laughing at you. As a bonus, my long underwear are riding up over my girdle, making me appear pregnant. I am not pregnant, don’t get excited.

Green Grape Apple Pie

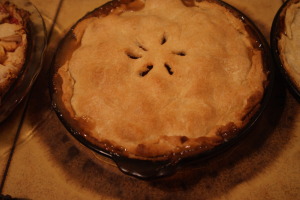
This pie did not explode, counter to all our expectations.

You read that right. Green grapes and apples. It was just too weird not to try.

“Will the grapes explode when we bake them?” we wondered. “Will they turn to mush?”

We decided that A) they would most likely explode and B) that’s probably why no one makes  Grape pies anymore.

They did not explode. They stayed pretty grape-like, in fact. It really wasn’t much different than apple pie, and we agreed that while it tasted fine, the grapes didn’t add enough oomph to make us want to make it again. But if you want to, here’s the recipe:

You need:

Two crusts.

Filling

2 cups seedless green grapes
3 cups sliced peeled apples
1 cup sugar
3 TBSP quick-cooking tapioca
1⁄4 tsp. each cinnamon, cardamom and salt
2 TBSP margarine (originally butter)

Mix everything together except for the margarine. Allow to sit for a few minutes, to get all melded and tapioca-ed. Pour into a piecrust, and dot the top with margarine. Put on the top crust, seal the edges and vent the crust. Bake for 50-60 minutes in a 425 degree oven.

So if you encounter a really good grape sale, or something, you can make a pie! I would gladly eat this on any occasion, but doubt I’ll make it again.


How to Make a Piecrust

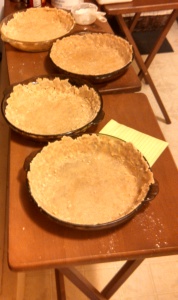
Four crusts waiting for glory.

Don’t freak out. You can totally make a piecrust.

It’s not actually that hard. I don’t know how the idea that piecrust is mysterious and difficult has gotten around, but it certainly has. I used to be very intimidated by piecrust, convinced I’d mess it up somehow and that there was something, nature or nurture, that gave other people certain piecrust know-how that I could not access.

Piecrust is really just a matter of science, practice and patience. It contains, at it’s core, three things: flour, fat, liquid. With a couple of tricks, you’ll be rolling with the best of them in no time.

Things You Need to Make a Piecrust.

  • A trusty pie crust recipe.

For Seven Pie Mountain, we used A’s grandma’s old, top-secret, very special recipe. AKA, the one from the Crisco can. It’s very simple. Two cups of flour, two-thirds of a cup shortening, quarter cup of water. The original Crisco one includes salt, but we didn’t. I’ve also had great luck with the single pastry crust recipe in Veganomicon, which includes apple cider vinegar, and the olive oil crust in Vegan Pie in the Sky.

  • A rolling pin, or something that works like one.

A good wooden rolling pin is my weapon of choice, but you can use something else. I’ve rolled cookies out with a drinking glass, and A says her grandma’s first rolling pin was a sawed-off broom handle. Anything solid and cylindrical will do the job. But if you see a lot of baking in your future, find yourself a rolling pin. Thrift store kitchen sections may be your friend here, or fancy kitchen stores, if you, too, are fancy. You can spend as little or much as you want.

  • A surface for rolling.

Trying to roll out pie crust on a surface that is too small leads to much sadness and banged elbows. Make sure you’ve got enough room, even if you have to move it to the dining room table, or a piece of clean cardboard on the floor.

  • A pastry cutter (preferred) or two knives, or a knife and a fork.

A pastry cutter is a nifty little hand-held device with several u-shaped blades, used to combine flour with fat. They are not expensive, and they are really, truly, the best tool for the task, as far as I’m concerned. However, if you don’t want a gadget or hate cool things, go ahead and use two knives, or a knife and fork to cut and cut and cut the flour and fat together. See what I care.

  • Extra points: parchment paper. Wax paper in a pinch.

Some people are: A) very skilled piecrust rollers or B) don’t mind making a really big mess. If you, like I, are neither of those things, then parchment paper is going to be very useful for you. You can, conceivably, flour your surface, roll out the crust directly onto it, and take it from there. That would be the most vintage thing to do. A’s grandma could roll her crust out onto the counter, pick it up with the rolling pin, and toss it into the pie plate, but people aren’t raised to be that badass anymore. However, to retrofit, I suggest using parchment paper. I used to use wax paper, but A taught me a better way, and I saw the light.

Methodology Continue reading “How to Make a Piecrust”

Giant Baking Projects, Frustration-Free!

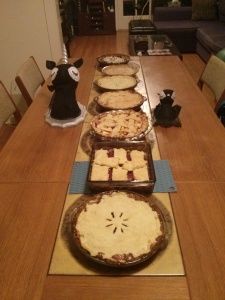
Seven Pies. Unicorn and Bat proudly guard them.

As the holiday season approaches, consider heading into the kitchen and making a bunch of something, and giving some of it to everyone you see.  The choices are many–cookies, candies, soup mixes, moonshine. A large scale making operation can be a lot of fun, whatever you make.  However, making a bunch of something can be trickier–the larger the number of things you’re making, the greater the opportunity for disaster.

The Illustrious A and I just finished making seven pies in as many hours. We’re a little bit strange, in that both of us thought, “Let’s make as many pies as we have pie plates between us, in a single day, and each pie shall be different, unique amongst the pies!” was an absolutely swell idea. We had a special, “Let’s look at the recipes!” meeting. We had emails about the pies. We had dreams and hopes about the pies. I think we’re awesome, and you would too, if we gave you some pie.

Baking a lot of things at once may not be everyone’s idea of a swell time, but we had an irrational amount of fun. However, our pie baking extravaganza could have been a disaster, even though we both love baking. It wasn’t, because of some very specific things we did in the name of efficiency, camaraderie, and sanity. We’ll introduce each pie we made from the Farm Journal Complete Pie Cookbook (c. 1965) this week, but before all of that, let’s cover some basics for baking success when you’re making a ridiculous quantity of baked goods.

Here are some of the top lessons from our successful seven hour pie extravaganza, to help you in your own adventures:

1. Don’t go at it alone.

A and I agreed, climbing Seven Pie Mountain alone would have been a drag. It would have taken a lot longer, and we’d probably have gotten a little frustrated and bored.  Instead, we were able to entertain each other and became a two-woman pie-making machine. If you are working on something big, consider inviting a friend, or spouse, or child, or neighbor into your project. Twice the hands make half the work, and all that.

2. But choose your partner carefully.

Not everyone who likes each other should share a kitchen. When choosing your partner-in-crime, think about how you might work together. A and I are very well suited to baking together, because we have a similar working style and energy, and were equally excited to do the project. If you and your spouse constantly bicker about who is chopping apples the “right way” and who is out of their damn mind, I suggest that an epic baking project may not be that fun for you. Likewise, if you’re very neat, and your son uses every single bowl in the kitchen to make toast, again, maybe you should just go to lunch together, not bake for hours on end. Perfectionists and “Looks Good Enough to Me” people, people who are having a fight about something else, people who are trying to decide if maybe they should get married or if maybe it’s the wrong time–stay out of the kitchen.

3. Plan ahead.

Figure out what you can do ahead of time. We chose our recipes and made a grocery list to divide and conquer a couple of days before Piemageddon. Since she is a true hero, A peeled and chopped all of the apples we could possibly need before I got to her house. She also bought 15 lbs of flour, just in case. I made seitan the night before. We gathered dishes, and made sure we had an extra rolling pin and  pastry cutter. These little things made everything run smoothly. We didn’t have to wait for the other person to finish with a tool, or run to the store for another pound of apples. Since we had scheduled the entire day to work on pie, we could work at a reasonable pace, rather than frantically try to finish up by a certain time.

Try to gather your supplies before the day of your project. That way, you can spend your project day doing the project, rather than doing prep work for the project. Consider scheduling your day a couple of weeks ahead, and blocking off the calendar. Then collect the supplies over the course of the weeks, rather than all at once.

4. Strategize

Not only do you need a plan to prepare, you also need a plan of attack for the day of your project.

This is where following the first lesson and teaming up with someone really worked out. “What’s the oven temp for each recipe?” A asked, at the beginning, like a smart person does. We noted each temperature, and then scheduled the order of our baking from the lowest to the highest temperature. We didn’t have to wait for the oven to cool down, we just turned it up as we went. Without her, I would have no doubt ordered things haphazardly, turning the oven up and down and up and down, and making everything take a hundred years.

We were very strategic about multi-tasking. Instead of trying to do many things at once, we cooperated to make the most of our time while each doing one thing. We made the pie crusts one recipe at a time, but each made our own batch, doubling the output without doubling the recipe.  We didn’t try to work on multiple pies at once, instead we cooperated in true Sesame Street fashion–I’d stir filling on the stove while A rolled a crust, she’d put things in the oven while I washed some dishes. Neither of us got flustered or confused, because we still only had one job at a time.

Consider variables like temperature, baking time, and how recipes might overlap, then make a plan to maximize your time, but don’t try to do everything at once.

5. Clean up as you go.

Or you will never, ever emerge from the pile of dishes. Never. And unless you have a truly endless supply of measuring spoons, you will eventually run out of clean ones, if you aren’t keeping up on the washing.

6. Eat something that isn’t what you’re baking.

If you attempt to bake for seven hours, eating only snatched spoonfuls of pie filling, and the leftover bits of apple on the core, you are going to be cranky. And possibly dizzy. And you will say a lot of angry things about deciding to climb Seven Pie Mountain. Instead, we ate a quick, sensible lunch. Taking the time to do this saved us time in fainting.

6. Keep your sense of humor.

After all, you’re just making pie, not fighting The Man, or speaking truth to power, or saving the world. No one will die if your crust breaks. And break it will. So you might as well loudly beg it to stop being a jerk. It may make your partner laugh, and then you’ll laugh, too.


Have you ever baked an irrational amount of something? What are your tips?