It’s not actually that hard. I don’t know how the idea that piecrust is mysterious and difficult has gotten around, but it certainly has. I used to be very intimidated by piecrust, convinced I’d mess it up somehow and that there was something, nature or nurture, that gave other people certain piecrust know-how that I could not access.
Piecrust is really just a matter of science, practice and patience. It contains, at it’s core, three things: flour, fat, liquid. With a couple of tricks, you’ll be rolling with the best of them in no time.
Things You Need to Make a Piecrust.
A trusty pie crust recipe.
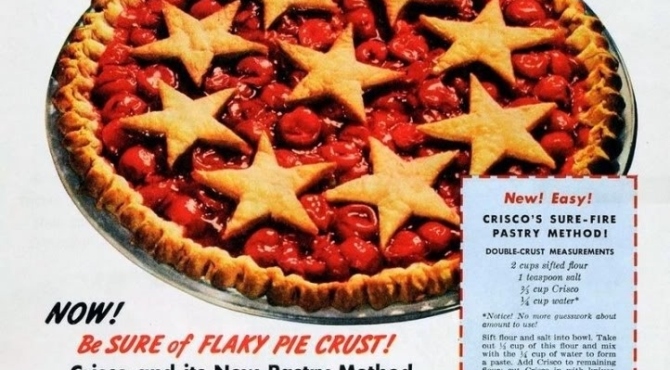
For Seven Pie Mountain, we used A’s grandma’s old, top-secret, very special recipe. AKA, the one from the Crisco can. It’s very simple. Two cups of flour, two-thirds of a cup shortening, quarter cup of water. The original Crisco one includes salt, but we didn’t. I’ve also had great luck with the single pastry crust recipe in Veganomicon, which includes apple cider vinegar, and the olive oil crust in Vegan Pie in the Sky.
A rolling pin, or something that works like one.
A good wooden rolling pin is my weapon of choice, but you can use something else. I’ve rolled cookies out with a drinking glass, and A says her grandma’s first rolling pin was a sawed-off broom handle. Anything solid and cylindrical will do the job. But if you see a lot of baking in your future, find yourself a rolling pin. Thrift store kitchen sections may be your friend here, or fancy kitchen stores, if you, too, are fancy. You can spend as little or much as you want.
A surface for rolling.
Trying to roll out pie crust on a surface that is too small leads to much sadness and banged elbows. Make sure you’ve got enough room, even if you have to move it to the dining room table, or a piece of clean cardboard on the floor.
A pastry cutter (preferred) or two knives, or a knife and a fork.
A pastry cutter is a nifty little hand-held device with several u-shaped blades, used to combine flour with fat. They are not expensive, and they are really, truly, the best tool for the task, as far as I’m concerned. However, if you don’t want a gadget or hate cool things, go ahead and use two knives, or a knife and fork to cut and cut and cut the flour and fat together. See what I care.
Extra points: parchment paper. Wax paper in a pinch.
Some people are: A) very skilled piecrust rollers or B) don’t mind making a really big mess. If you, like I, are neither of those things, then parchment paper is going to be very useful for you. You can, conceivably, flour your surface, roll out the crust directly onto it, and take it from there. That would be the most vintage thing to do. A’s grandma could roll her crust out onto the counter, pick it up with the rolling pin, and toss it into the pie plate, but people aren’t raised to be that badass anymore. However, to retrofit, I suggest using parchment paper. I used to use wax paper, but A taught me a better way, and I saw the light.
As the holiday season approaches, consider heading into the kitchen and making a bunch of something, and giving some of it to everyone you see. The choices are many–cookies, candies, soup mixes, moonshine. A large scale making operation can be a lot of fun, whatever you make. However, making a bunch of something can be trickier–the larger the number of things you’re making, the greater the opportunity for disaster.
The Illustrious A and I just finished making seven pies in as many hours. We’re a little bit strange, in that both of us thought, “Let’s make as many pies as we have pie plates between us, in a single day, and each pie shall be different, unique amongst the pies!” was an absolutely swell idea. We had a special, “Let’s look at the recipes!” meeting. We had emails about the pies. We had dreams and hopes about the pies. I think we’re awesome, and you would too, if we gave you some pie.
Baking a lot of things at once may not be everyone’s idea of a swell time, but we had an irrational amount of fun. However, our pie baking extravaganza could have been a disaster, even though we both love baking. It wasn’t, because of some very specific things we did in the name of efficiency, camaraderie, and sanity. We’ll introduce each pie we made from the Farm Journal Complete Pie Cookbook (c. 1965) this week, but before all of that, let’s cover some basics for baking success when you’re making a ridiculous quantity of baked goods.
Here are some of the top lessons from our successful seven hour pie extravaganza, to help you in your own adventures:
1. Don’t go at it alone.
A and I agreed, climbing Seven Pie Mountain alone would have been a drag. It would have taken a lot longer, and we’d probably have gotten a little frustrated and bored. Instead, we were able to entertain each other and became a two-woman pie-making machine. If you are working on something big, consider inviting a friend, or spouse, or child, or neighbor into your project. Twice the hands make half the work, and all that.
2. But choose your partner carefully.
Not everyone who likes each other should share a kitchen. When choosing your partner-in-crime, think about how you might work together. A and I are very well suited to baking together, because we have a similar working style and energy, and were equally excited to do the project. If you and your spouse constantly bicker about who is chopping apples the “right way” and who is out of their damn mind, I suggest that an epic baking project may not be that fun for you. Likewise, if you’re very neat, and your son uses every single bowl in the kitchen to make toast, again, maybe you should just go to lunch together, not bake for hours on end. Perfectionists and “Looks Good Enough to Me” people, people who are having a fight about something else, people who are trying to decide if maybe they should get married or if maybe it’s the wrong time–stay out of the kitchen.
3. Plan ahead.
Figure out what you can do ahead of time. We chose our recipes and made a grocery list to divide and conquer a couple of days before Piemageddon. Since she is a true hero, A peeled and chopped all of the apples we could possibly need before I got to her house. She also bought 15 lbs of flour, just in case. I made seitan the night before. We gathered dishes, and made sure we had an extra rolling pin and pastry cutter. These little things made everything run smoothly. We didn’t have to wait for the other person to finish with a tool, or run to the store for another pound of apples. Since we had scheduled the entire day to work on pie, we could work at a reasonable pace, rather than frantically try to finish up by a certain time.
Try to gather your supplies before the day of your project. That way, you can spend your project day doing the project, rather than doing prep work for the project. Consider scheduling your day a couple of weeks ahead, and blocking off the calendar. Then collect the supplies over the course of the weeks, rather than all at once.
4. Strategize
Not only do you need a plan to prepare, you also need a plan of attack for the day of your project.
This is where following the first lesson and teaming up with someone really worked out. “What’s the oven temp for each recipe?” A asked, at the beginning, like a smart person does. We noted each temperature, and then scheduled the order of our baking from the lowest to the highest temperature. We didn’t have to wait for the oven to cool down, we just turned it up as we went. Without her, I would have no doubt ordered things haphazardly, turning the oven up and down and up and down, and making everything take a hundred years.
We were very strategic about multi-tasking. Instead of trying to do many things at once, we cooperated to make the most of our time while each doing one thing. We made the pie crusts one recipe at a time, but each made our own batch, doubling the output without doubling the recipe. We didn’t try to work on multiple pies at once, instead we cooperated in true Sesame Street fashion–I’d stir filling on the stove while A rolled a crust, she’d put things in the oven while I washed some dishes. Neither of us got flustered or confused, because we still only had one job at a time.
Consider variables like temperature, baking time, and how recipes might overlap, then make a plan to maximize your time, but don’t try to do everything at once.
5. Clean up as you go.
Or you will never, ever emerge from the pile of dishes. Never. And unless you have a truly endless supply of measuring spoons, you will eventually run out of clean ones, if you aren’t keeping up on the washing.
6. Eat something that isn’t what you’re baking.
If you attempt to bake for seven hours, eating only snatched spoonfuls of pie filling, and the leftover bits of apple on the core, you are going to be cranky. And possibly dizzy. And you will say a lot of angry things about deciding to climb Seven Pie Mountain. Instead, we ate a quick, sensible lunch. Taking the time to do this saved us time in fainting.
6. Keep your sense of humor.
After all, you’re just making pie, not fighting The Man, or speaking truth to power, or saving the world. No one will die if your crust breaks. And break it will. So you might as well loudly beg it to stop being a jerk. It may make your partner laugh, and then you’ll laugh, too.
Have you ever baked an irrational amount of something? What are your tips?
Thanksgiving is coming. This means that it’s time for pie. I personally think it’s always pie time, but Thanksgiving is certainly a pie-featuring holiday. Here on Retrofitting Vintage, we’re getting ready for a whole week’s worth of vintage pies. Baking-enthusiast A and I will be making seven (!!) vintage pie recipes, giving you many pie options. All recipes are from the 1965 Farm Journal’s Complete Pie Cookbook, which belongs to A.
Thanksgiving is an excellent opportunity to talk about taking good and leaving garbage from the past. Expect a post on this soon.
700 Best Dessert and Main-Dish pies in the Country, y’all.
No pictures today, because I’ve been forgetting to have my official photographer take my picture when I get home. Also, it’s dark when I get home, which makes for lousy pictures. Living on the eastern edge of the central time zone means that Daylight Savings knocks us flat in November. “Whhhhhhhhy is it sooooooo dark?” we, the people of Chicago, collectively wail.
Anyhow, I’ve been active and wearing my underpinnings since last we updated, and I have compiled the following list of ten things not to do in vintage underwear.
1. Don’t attend a football game in a girdle. I wore my light, hardly at all compressing one, and a long line bra, and it was okay. At first, I was going to wear much tighter foundations, and then I thought about sitting in bleachers and came to my senses. On the plus side, I was probably much warmer than people who didn’t cover their cores so effectively.
2. Don’t wear stocking with garters to an audition when you’re doing a monologue you usually perform while sitting slouchily. (On the other hand, perhaps I increased my air of mystery with my garter flashing.)
3. Don’t make out with someone while wearing a girdle. It’s mean to try to make another person take it off. Take it off yourself. Also, you might make a slight popping noise when it’s removed, much like a Pillsbury canned biscuit, which could kill the mood.
4. Running is just out. Don’t even.
5. I haven’t tried it, but I imagine cartwheels wouldn’t go well.
Had one moment when I thought my garter had come undone. False alarm!
Day 4
On November 4th I wore:
Same repro bra.
The heavy duty girdle from the first day.
Leggings.
This is an entirely appropriate situation for dancing with toddlers.
In This Getup I:
Drove a car
Voted!
Taught a toddler music class.
Went to my office job.
Notes:
Teaching class was surprisingly possible.
My bra did eventually get uncomfortable, but only after I’d been wearing it eight hours.
I did not wear these things during my dance rehearsal that night, because that just seemed silly.
But I did put them back on after.
Day 5
Today I wore:
A Rago girdle that is probably a little older, but I’m not sure it qualifies as vintage. Rago is a vintage brand–they’ve been manufacturing shapewear forever, in pretty much the same styles. This is the most constricting of my garments–it does not mess around.
My nice soft pretty long line bra.
The slip is a lie. I was wearing pants today, and didn’t want to try to get a pair of leggings under the girdle, or show my underpants to the Internet.
In This Getup I:
Went to work.
Went shopping (more on that later).
Went home.
Notes:
Again, I was squished, but it really didn’t bother me most of the day.
This was constricting enough that I didn’t keep it on once I got home.
The girdle may even be slightly too small, it’s hard to tell. There’s some tug on the hooks, but man, does it work.
I had to change pants this morning, because the ones I put on were too big over the girdle. This is a piece of machinery.
What is the most constricting garment you own? How often do you wear it?
This website uses cookies to improve your experience. We'll assume you're ok with this, but you can opt-out if you wish. Cookie settingsACCEPT
Privacy & Cookies Policy
Privacy Overview
This website uses cookies to improve your experience while you navigate through the website. Out of these cookies, the cookies that are categorized as necessary are stored on your browser as they are as essential for the working of basic functionalities of the website. We also use third-party cookies that help us analyze and understand how you use this website. These cookies will be stored in your browser only with your consent. You also have the option to opt-out of these cookies. But opting out of some of these cookies may have an effect on your browsing experience.
Necessary cookies are absolutely essential for the website to function properly. This category only includes cookies that ensures basic functionalities and security features of the website. These cookies do not store any personal information.